Custom Workflow Bot
Custom Workflow Bots work with Chat to help customers navigate your products, features, and services. Unlike pre-built bots triggered by orders or FAQ articles, Workflow Bots are triggered by workflows you create, giving you more flexibility and control.
With Workflow Bots, you can trigger a Custom Chatbot when:
- Customers submit a chat message
- Customers submit a chat message that matches specific conditions or rules
- Customers submit a chat message and that message matches a specific intent
- You manually hand off a customer during a chat to collect data or guide them through a flow
Benefits of Workflow Bots
Workflow Bots allow you to create targeted bots for specific situations. For example:
- Your store sells hiking gear. You can design a bot for each product category: tents, backpacks, climbing gear, etc.
- When a customer asks about “Backpacks,” the corresponding bot will ask questions and provide recommendations for that category.
- The workflow determines which bot to execute, allowing precise routing and customer guidance.
Creating a Workflow Bot
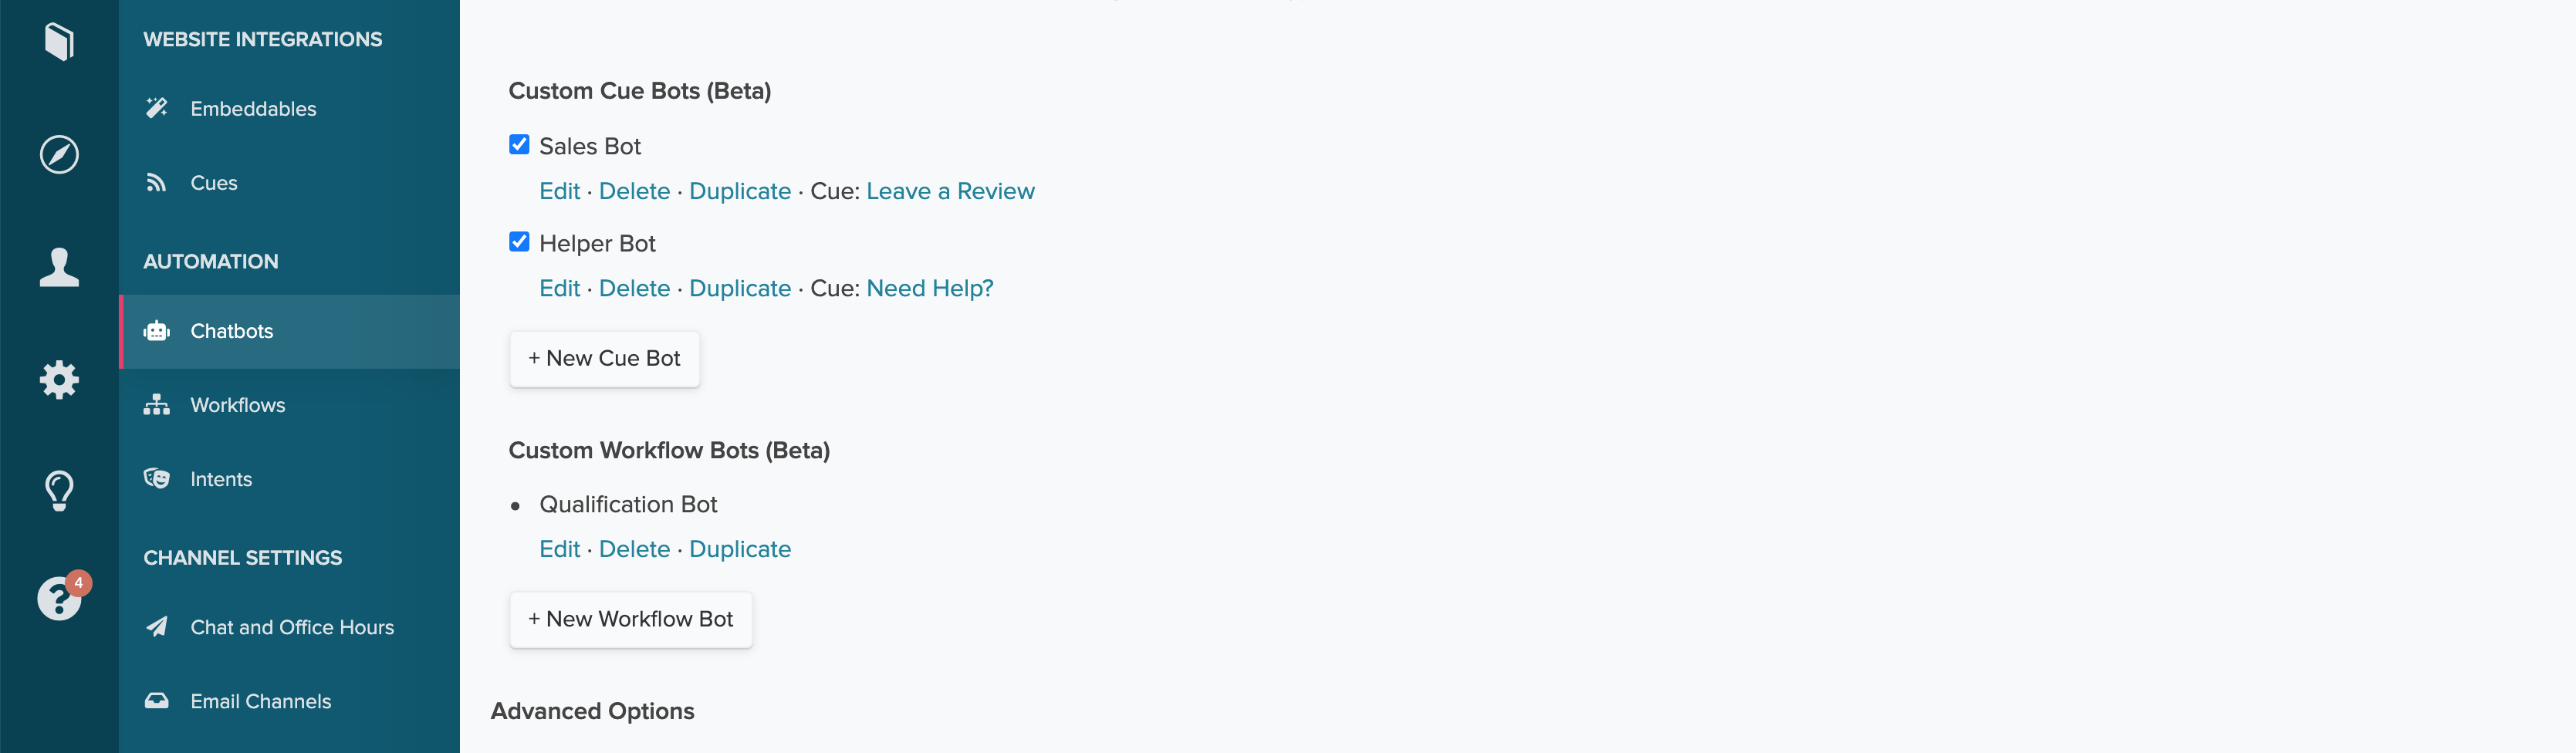
Before creating a Workflow that can trigger a Bot, you need to build the Bot itself:
- Navigate to Settings > AI Agent/Chatbots > Manage Bots
- Select Create New Workflow Bot
- Design your bot flow, adding additional steps as needed. Each step is called a node
Creating and Configuring Nodes
Nodes allow you to structure the conversation. Go through the setup process and design your Bot flow. You can add titles to each node that you create, which makes it super easy to identify each step. We recommend added titles because untitled nodes will be identified by their message body.
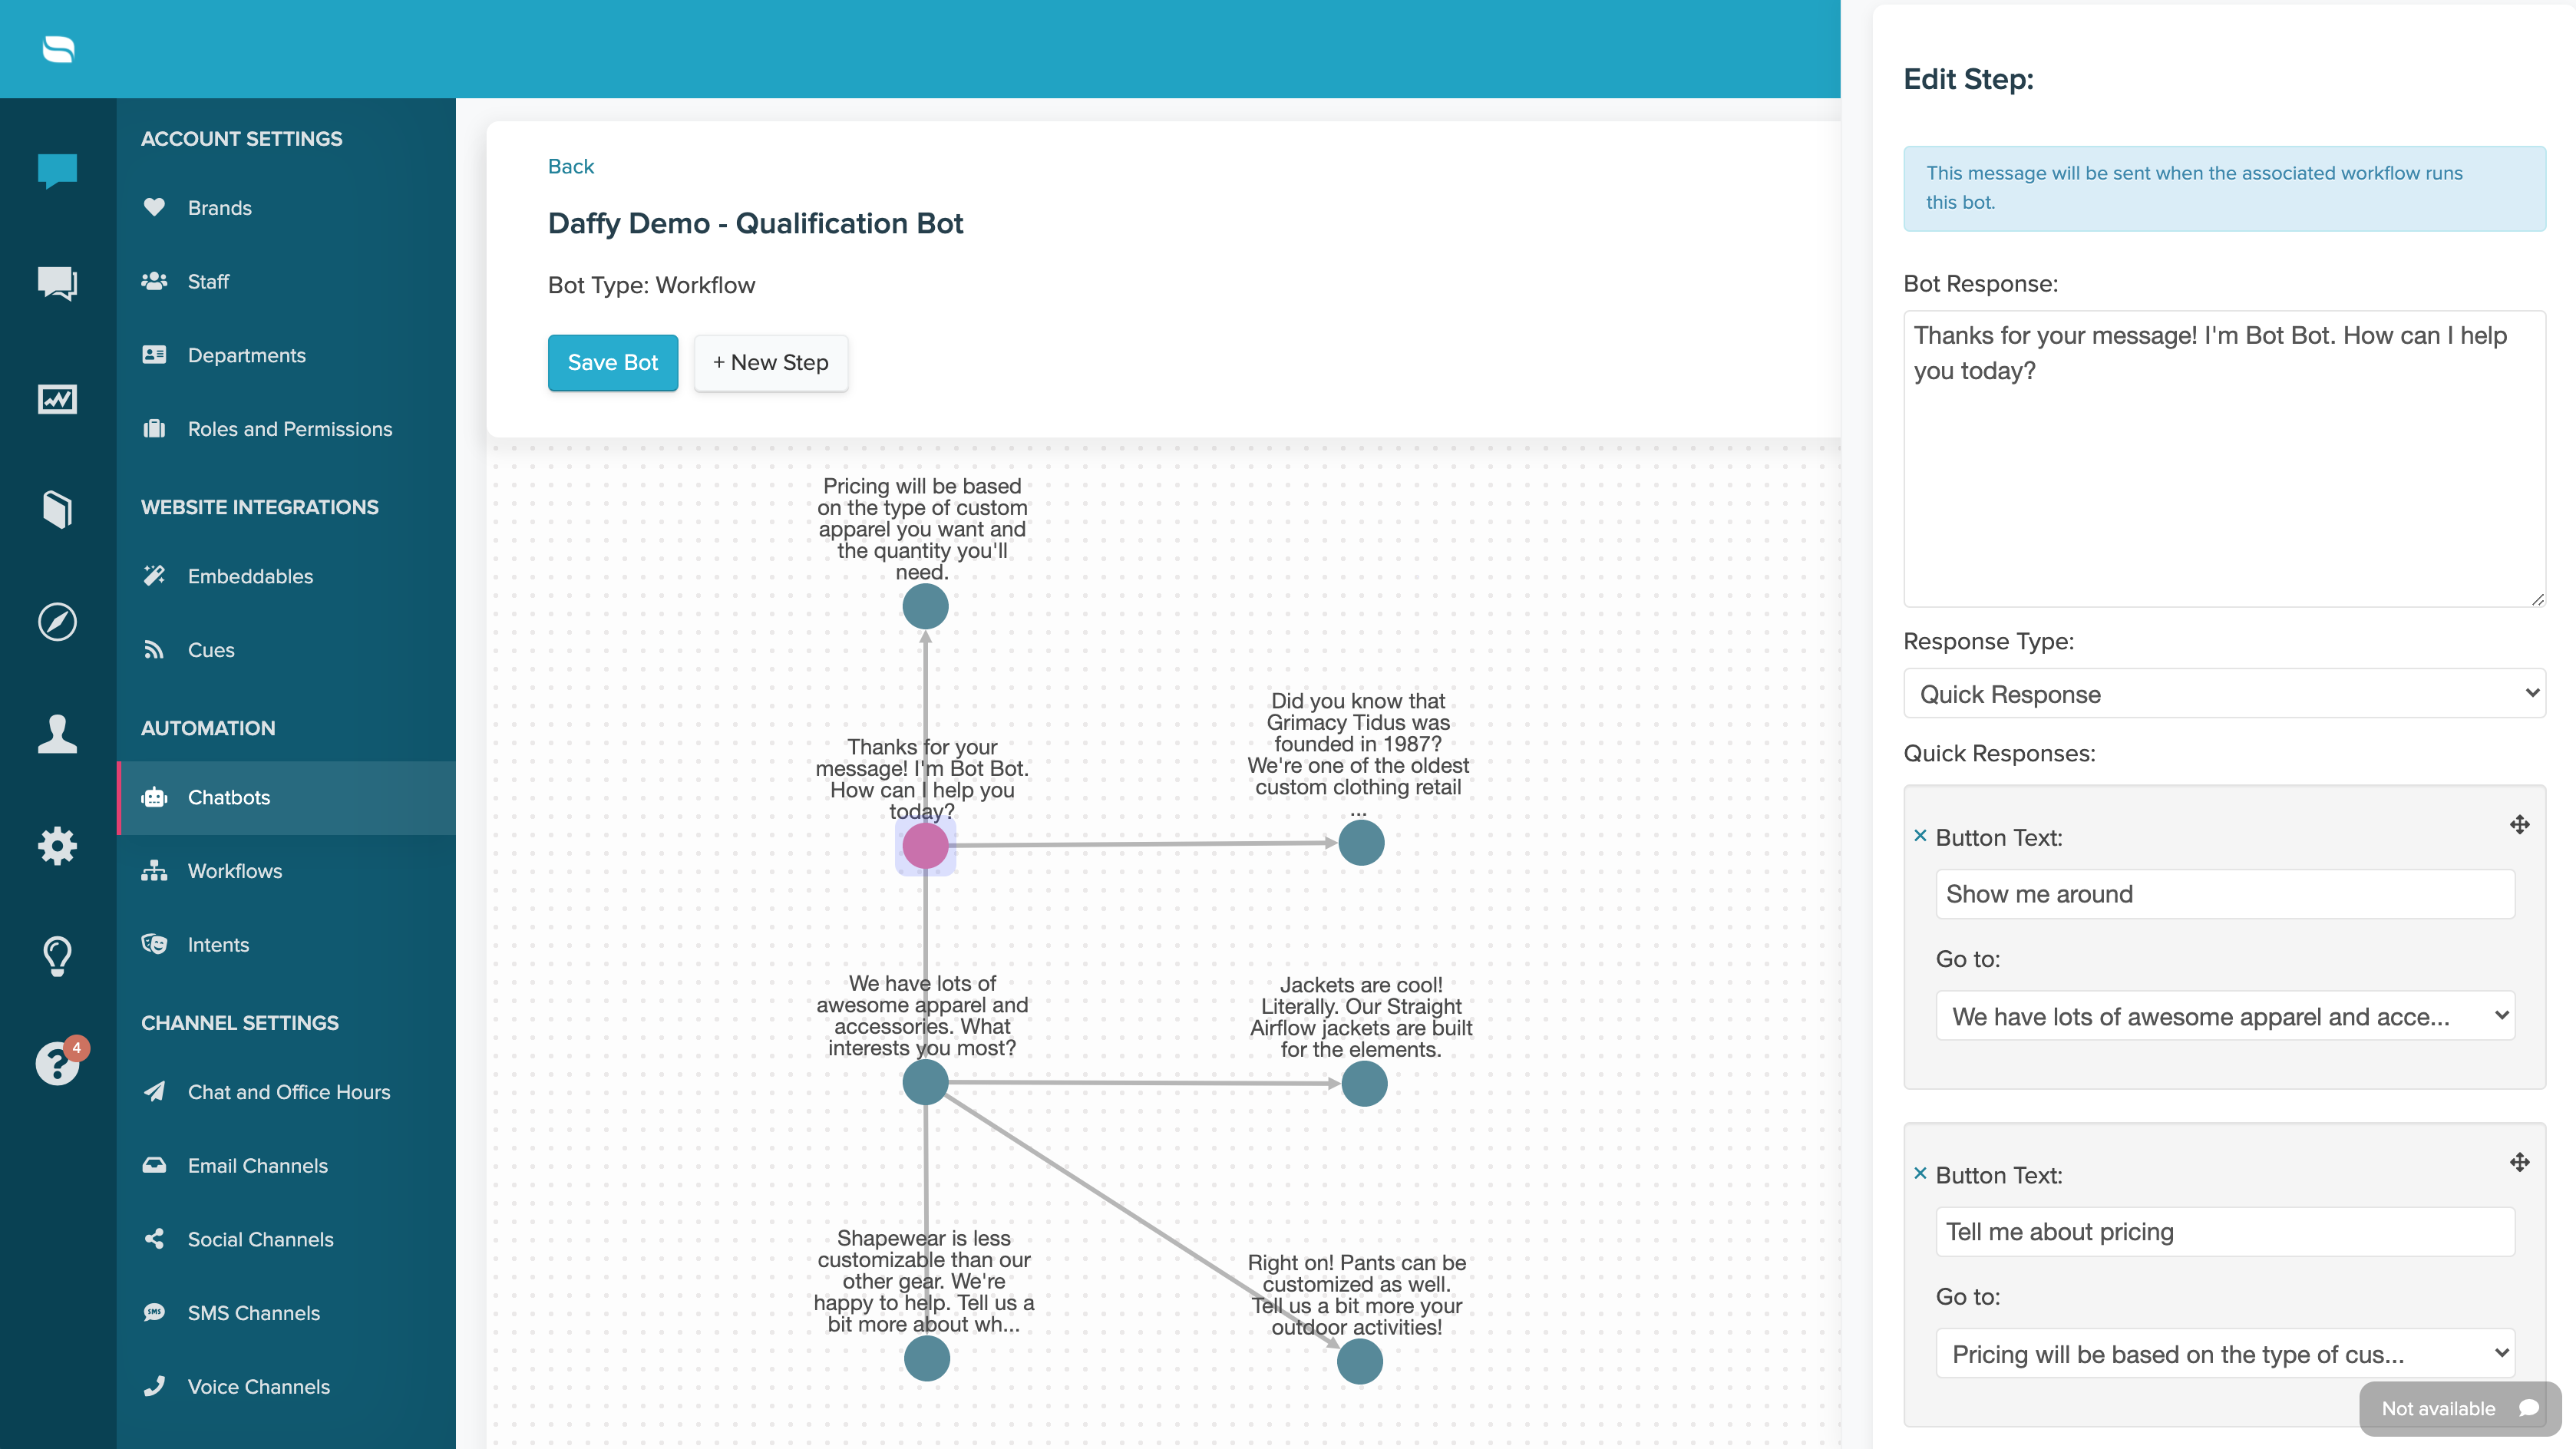
Every node must include a Bot Response. This is the message customers see after they select a quick response button or reach that step in the flow. You can add quick response buttons beneath the Bot Response to guide customers to the next step in the conversation. These buttons can:
- Send the customer to another node
- Escalate the conversation to your team
- Resolve the conversation if their question has been answered
Creating additional nodes allows you to build branching paths and guide customers through different questions and answers based on their selections.
Nodes include tools that help you provide richer, more helpful responses.
You can:
- insert links to FAQ articles
- include products from your store (Shopify, WooCommerce, Wix, or BigCommerce)
To insert a product, select the store logo above the Bot Response field. Choose the product(s) you want to include, then select Insert.
Within each node, you have the option to enable Show bot override option. By disabling this box, you remove the Speak to someone button from that step in the bot flow. This helps keep customers engaged with your bot rather than defaulting to a support agent.
Customers won’t be trapped in the bot flow. They can still type a message in the text box, which passes the conversation to an agent.
Common Workflow Bot setups
The most typical Workflow Bot you can create is one that is based on a new incoming conversation from your Chat channel with no additional conditions. This type of Workflow Bot will start whenever a new conversation is received via chat.
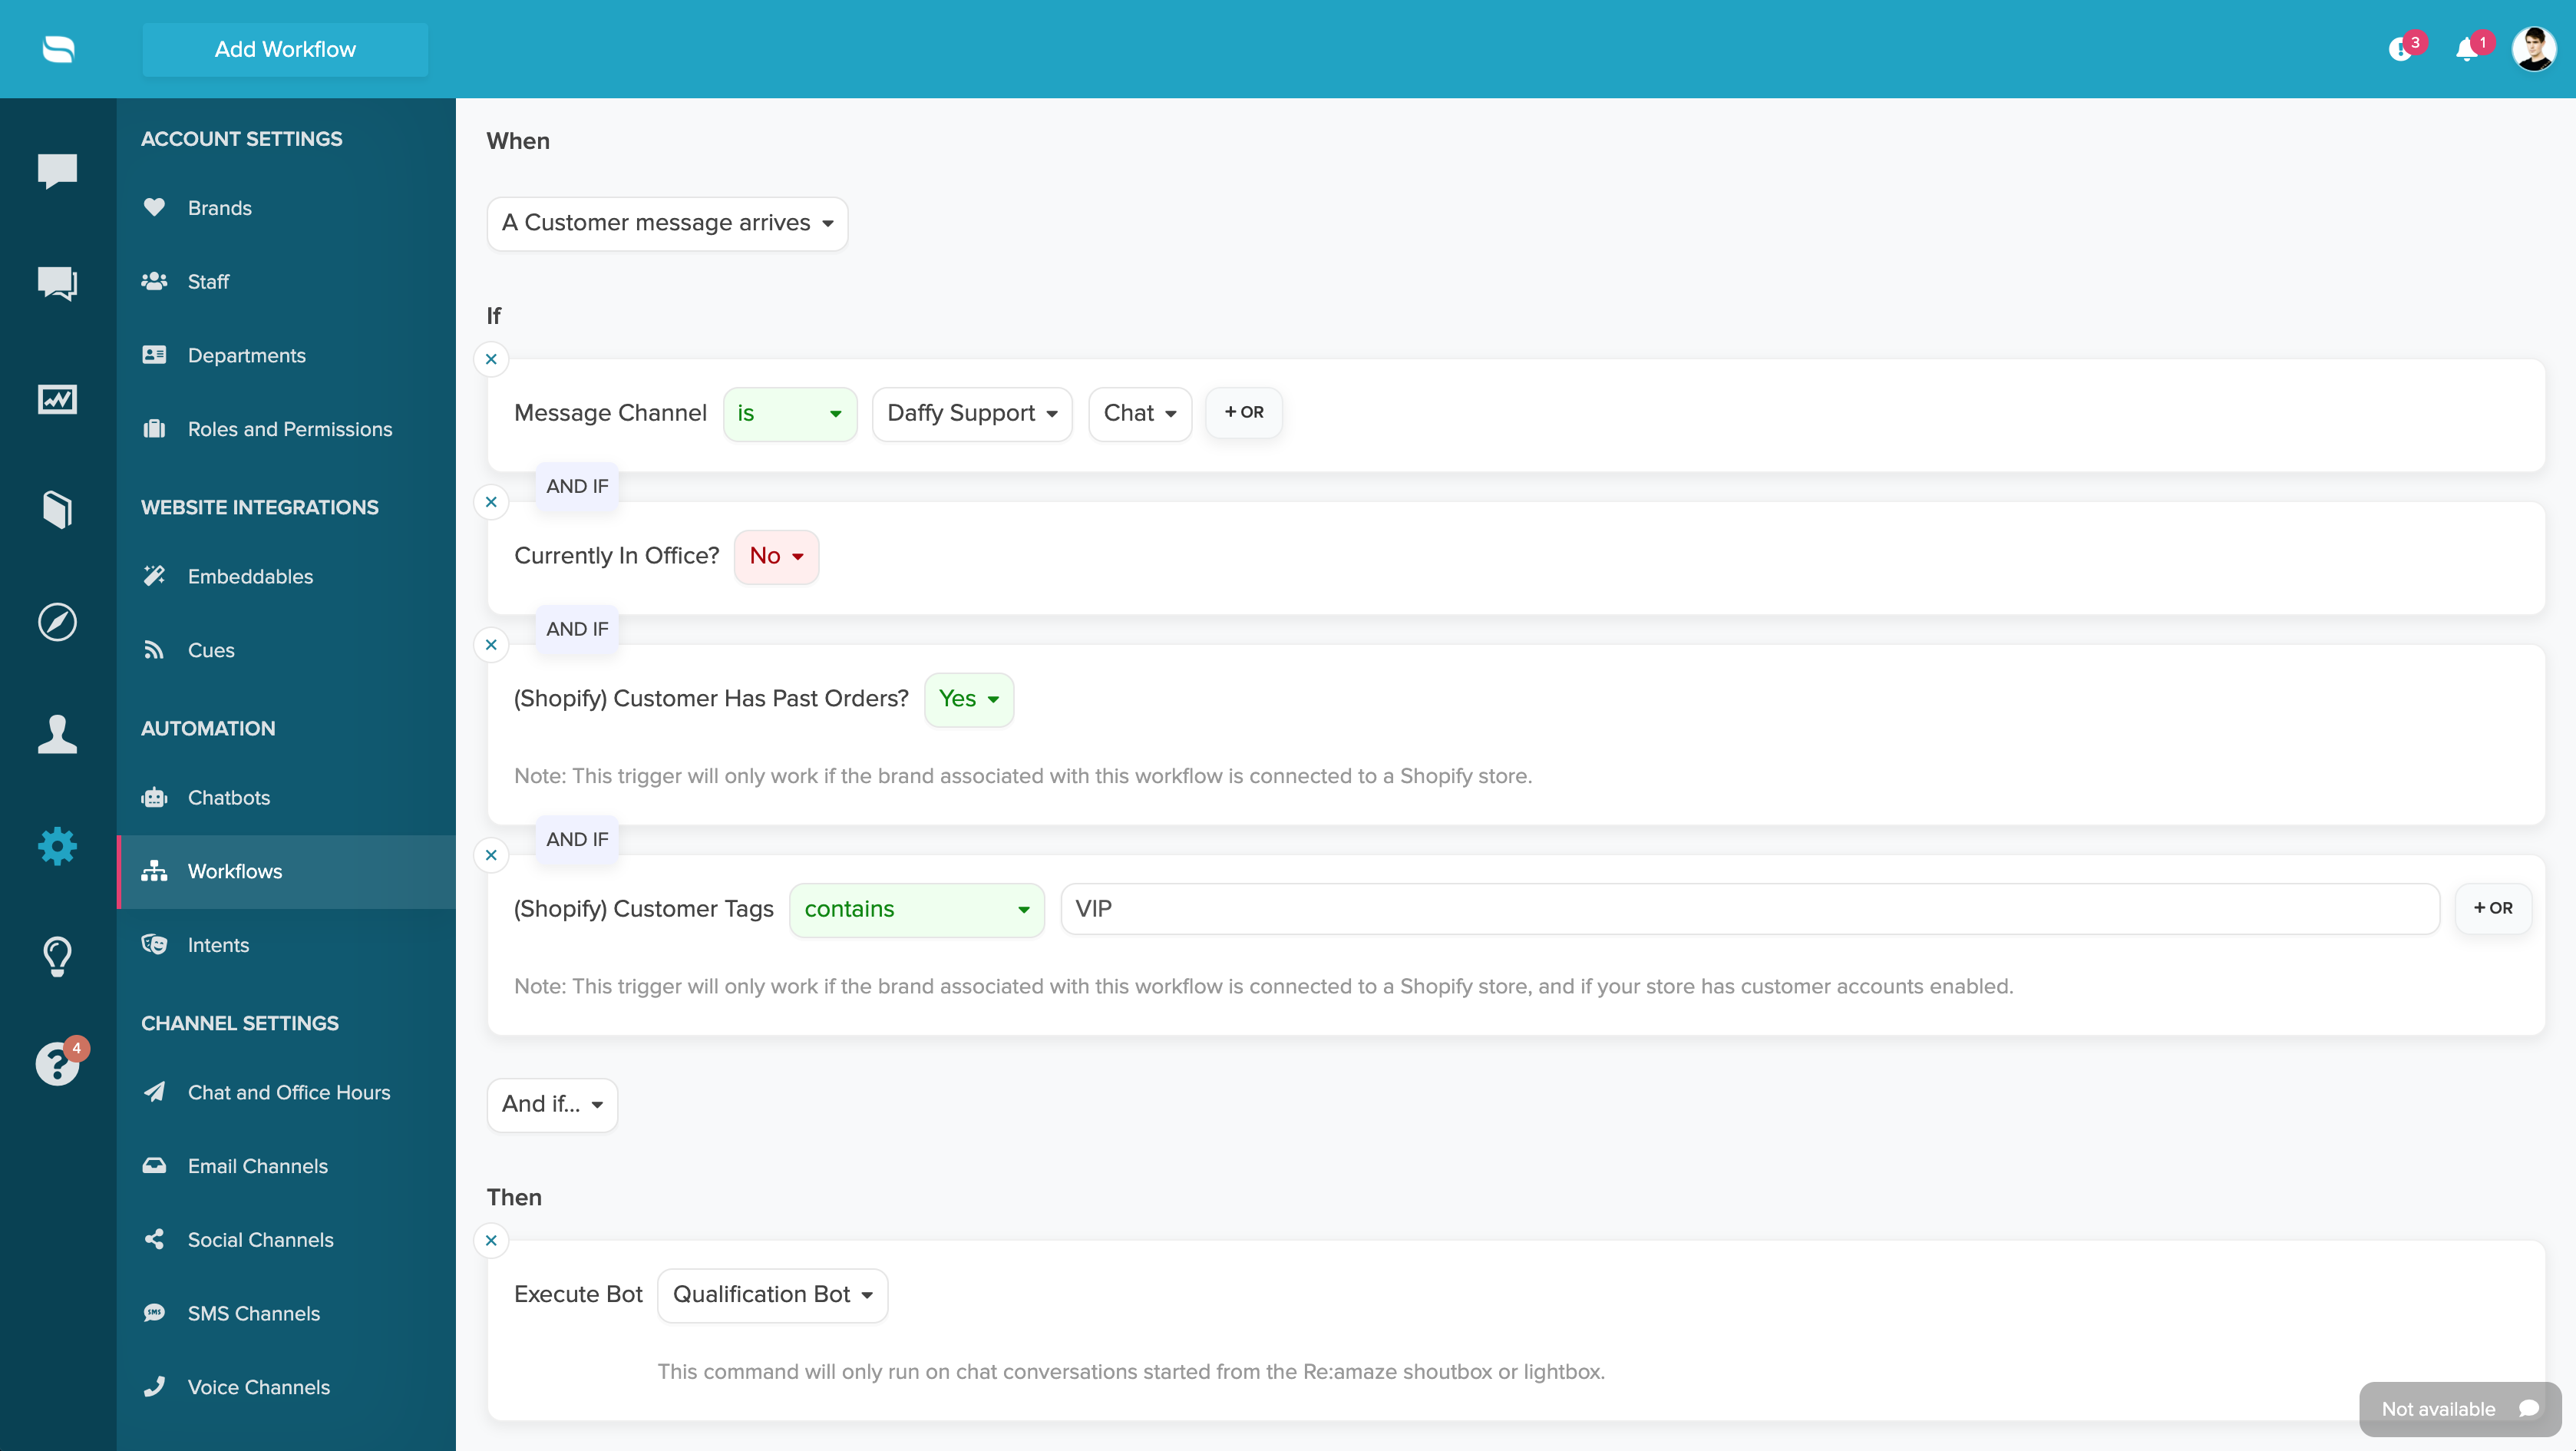
Workflows can include conditions to control when a bot runs.
For example, a bot might trigger only when:
- A new chat arrives outside office hours
- The customer has previous Shopify orders
- The customer has a VIP tag
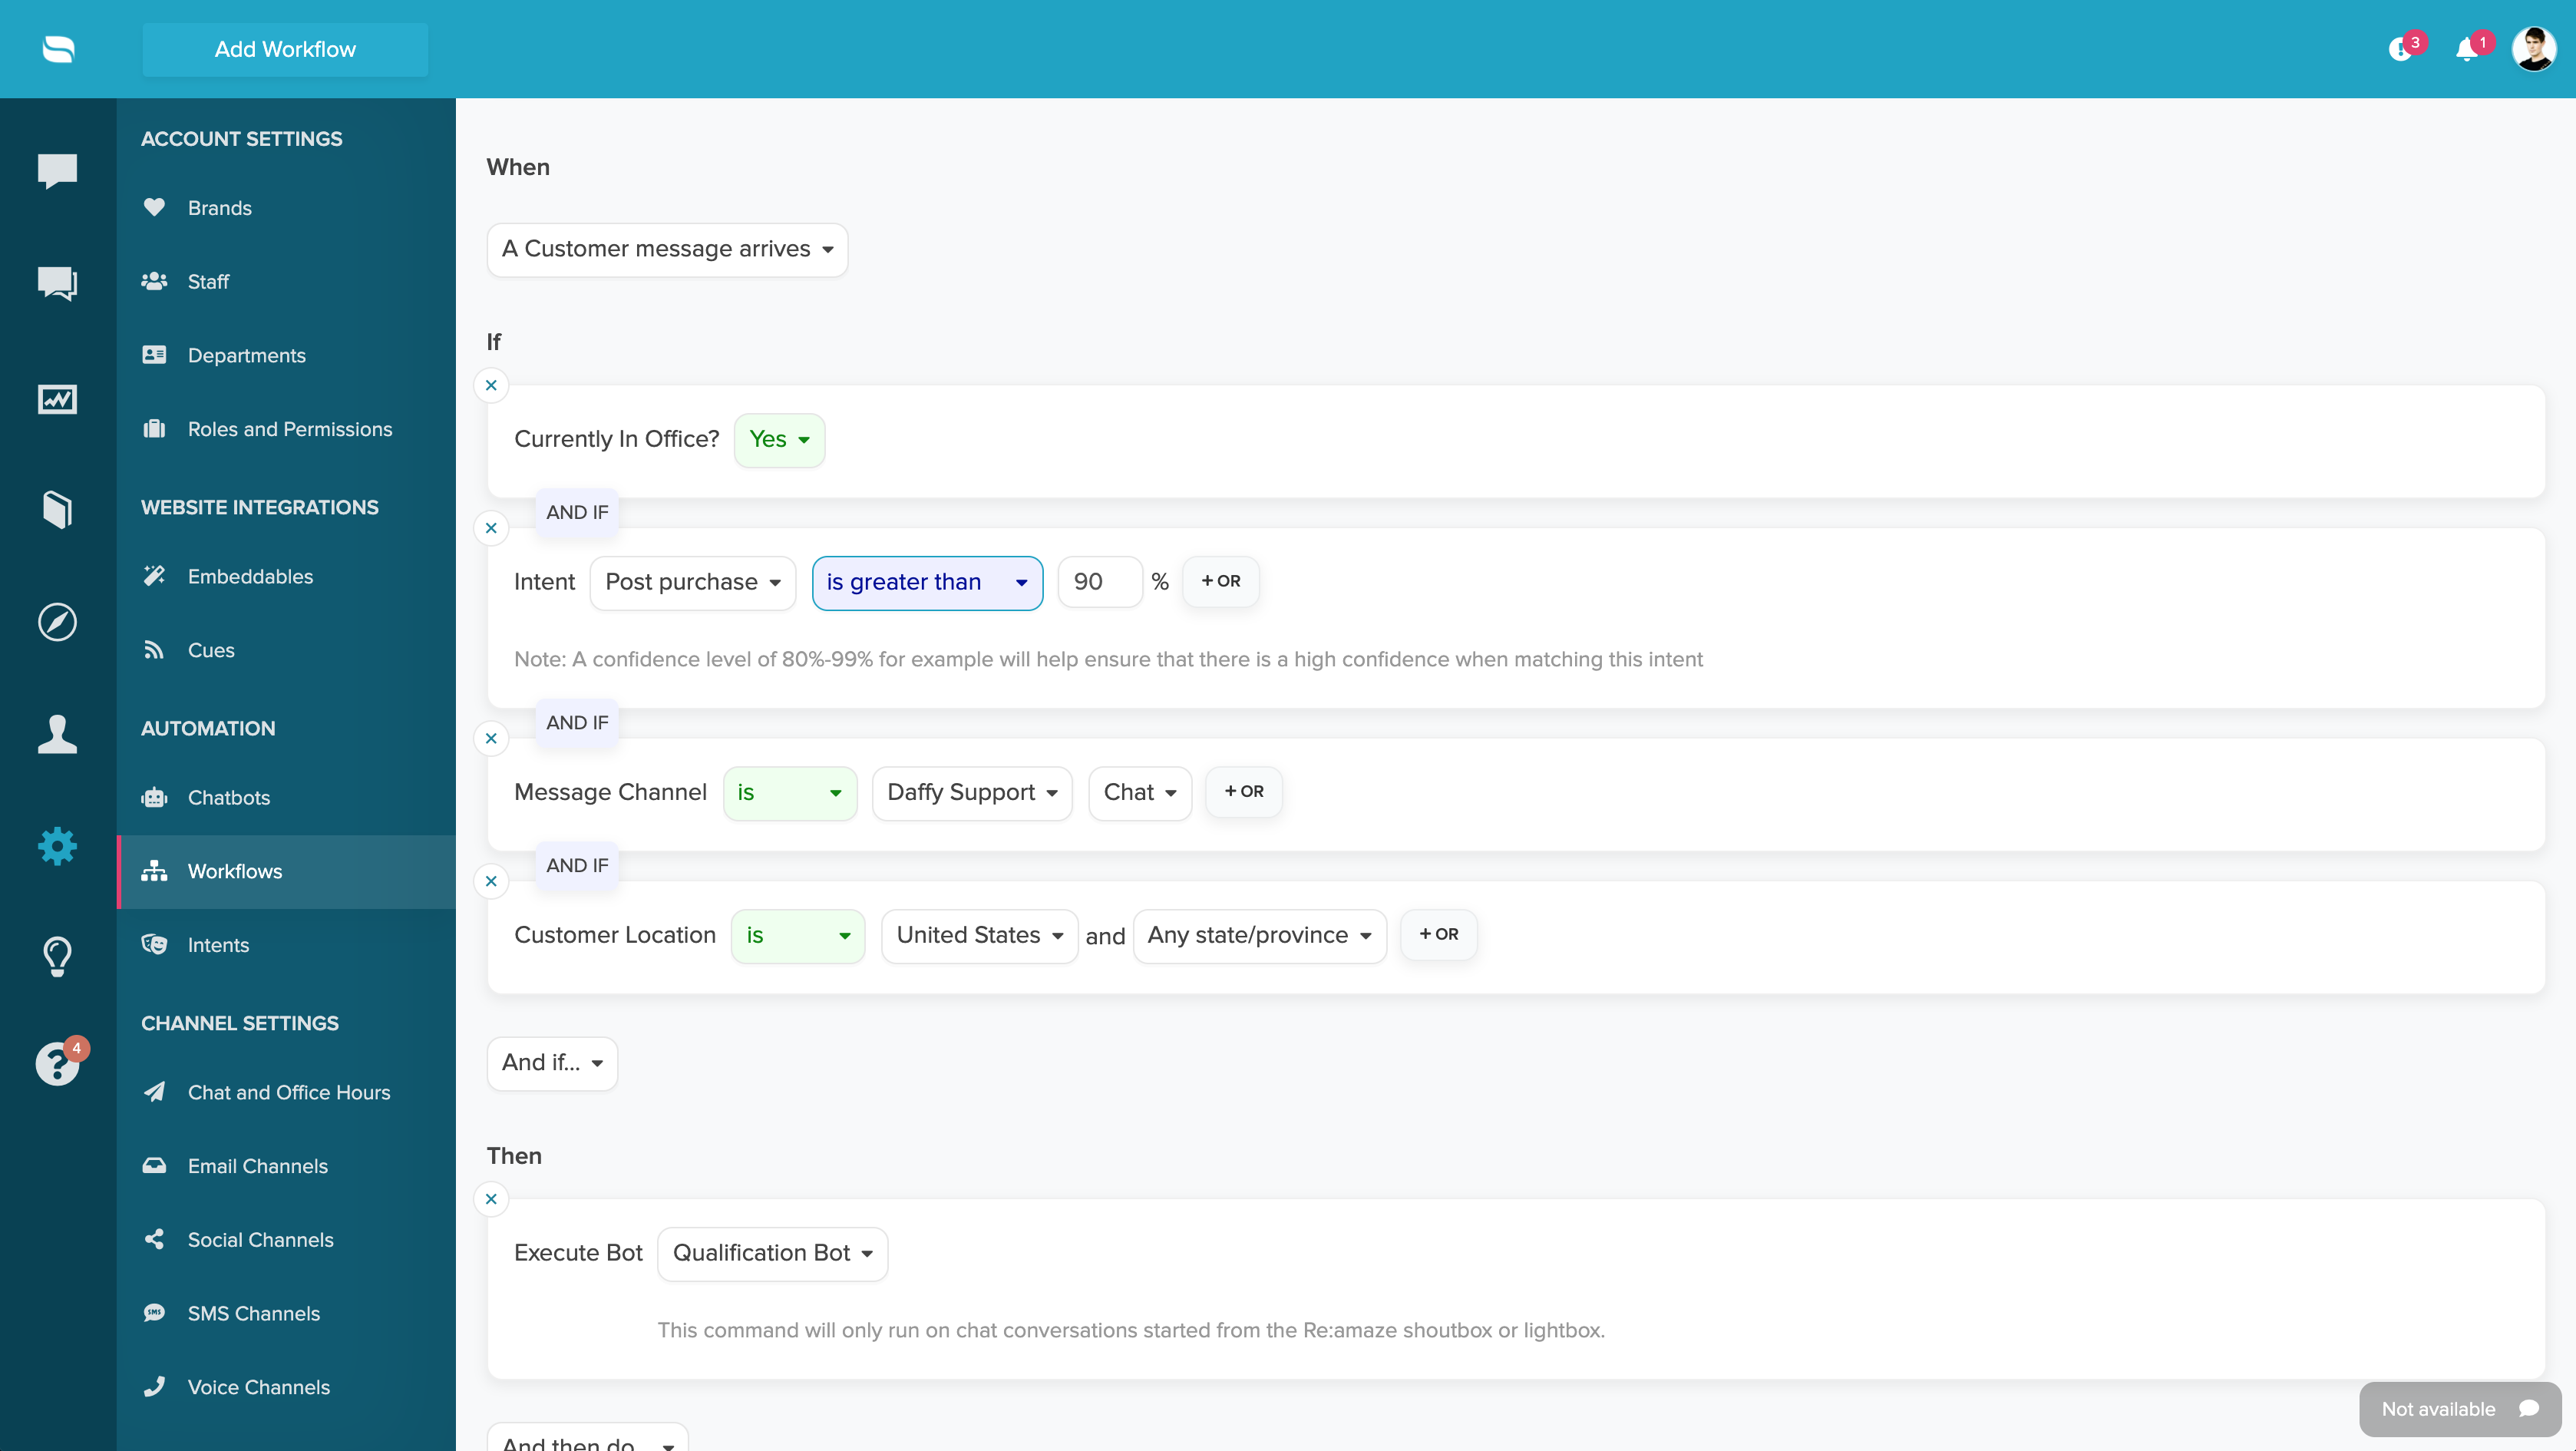
Workflow Bot With Intents
A powerful way to use Workflow Bots is by combining them with Intents. This allows you to automatically route customers to a specific chatbot based on the meaning or sentiment of their message.
For example, if a customer sends a chat message and a Return Request intent is detected with high confidence, a bot can immediately guide them through return instructions or next steps instead of waiting for an agent.
You might create intents such as Return Request, Product Replacement, or Order Status, and assign a bot to handle each type of inquiry.
Workflow Bots With Custom Fields
Custom Fields allow customers to provide information before or during a chat, such as selecting a department, product category, or reason for contacting you. You can use these selections to trigger a Workflow Bot automatically.
For example, if your chat form asks “What do you need help with?” and a customer selects Returns & Exchanges, a workflow can immediately launch a bot that:
- asks for the order number
- confirms the reason for the return
- provides return instructions
This helps customers get answers faster while collecting the details your team needs.

Workflow Bots With Reminders and Follow Ups
Workflow Bots can also automate follow-ups with customers.
When you place a conversation on hold and set a reminder, Re:amaze automatically reopens the conversation when the due date is reached. This event can be used as the “When” condition in a workflow.
For example, you might trigger a Follow-Up Bot when:
- An on-hold conversation becomes due
- The conversation is in the Chat channel
- The conversation includes a tag such as Follow-Up Needed
When triggered, the bot can:
- Ask the customer if they still need help
- Request any missing information
- Provide next steps or updated details
This allows you to follow up automatically while keeping conversations organized and tagged for tracking.

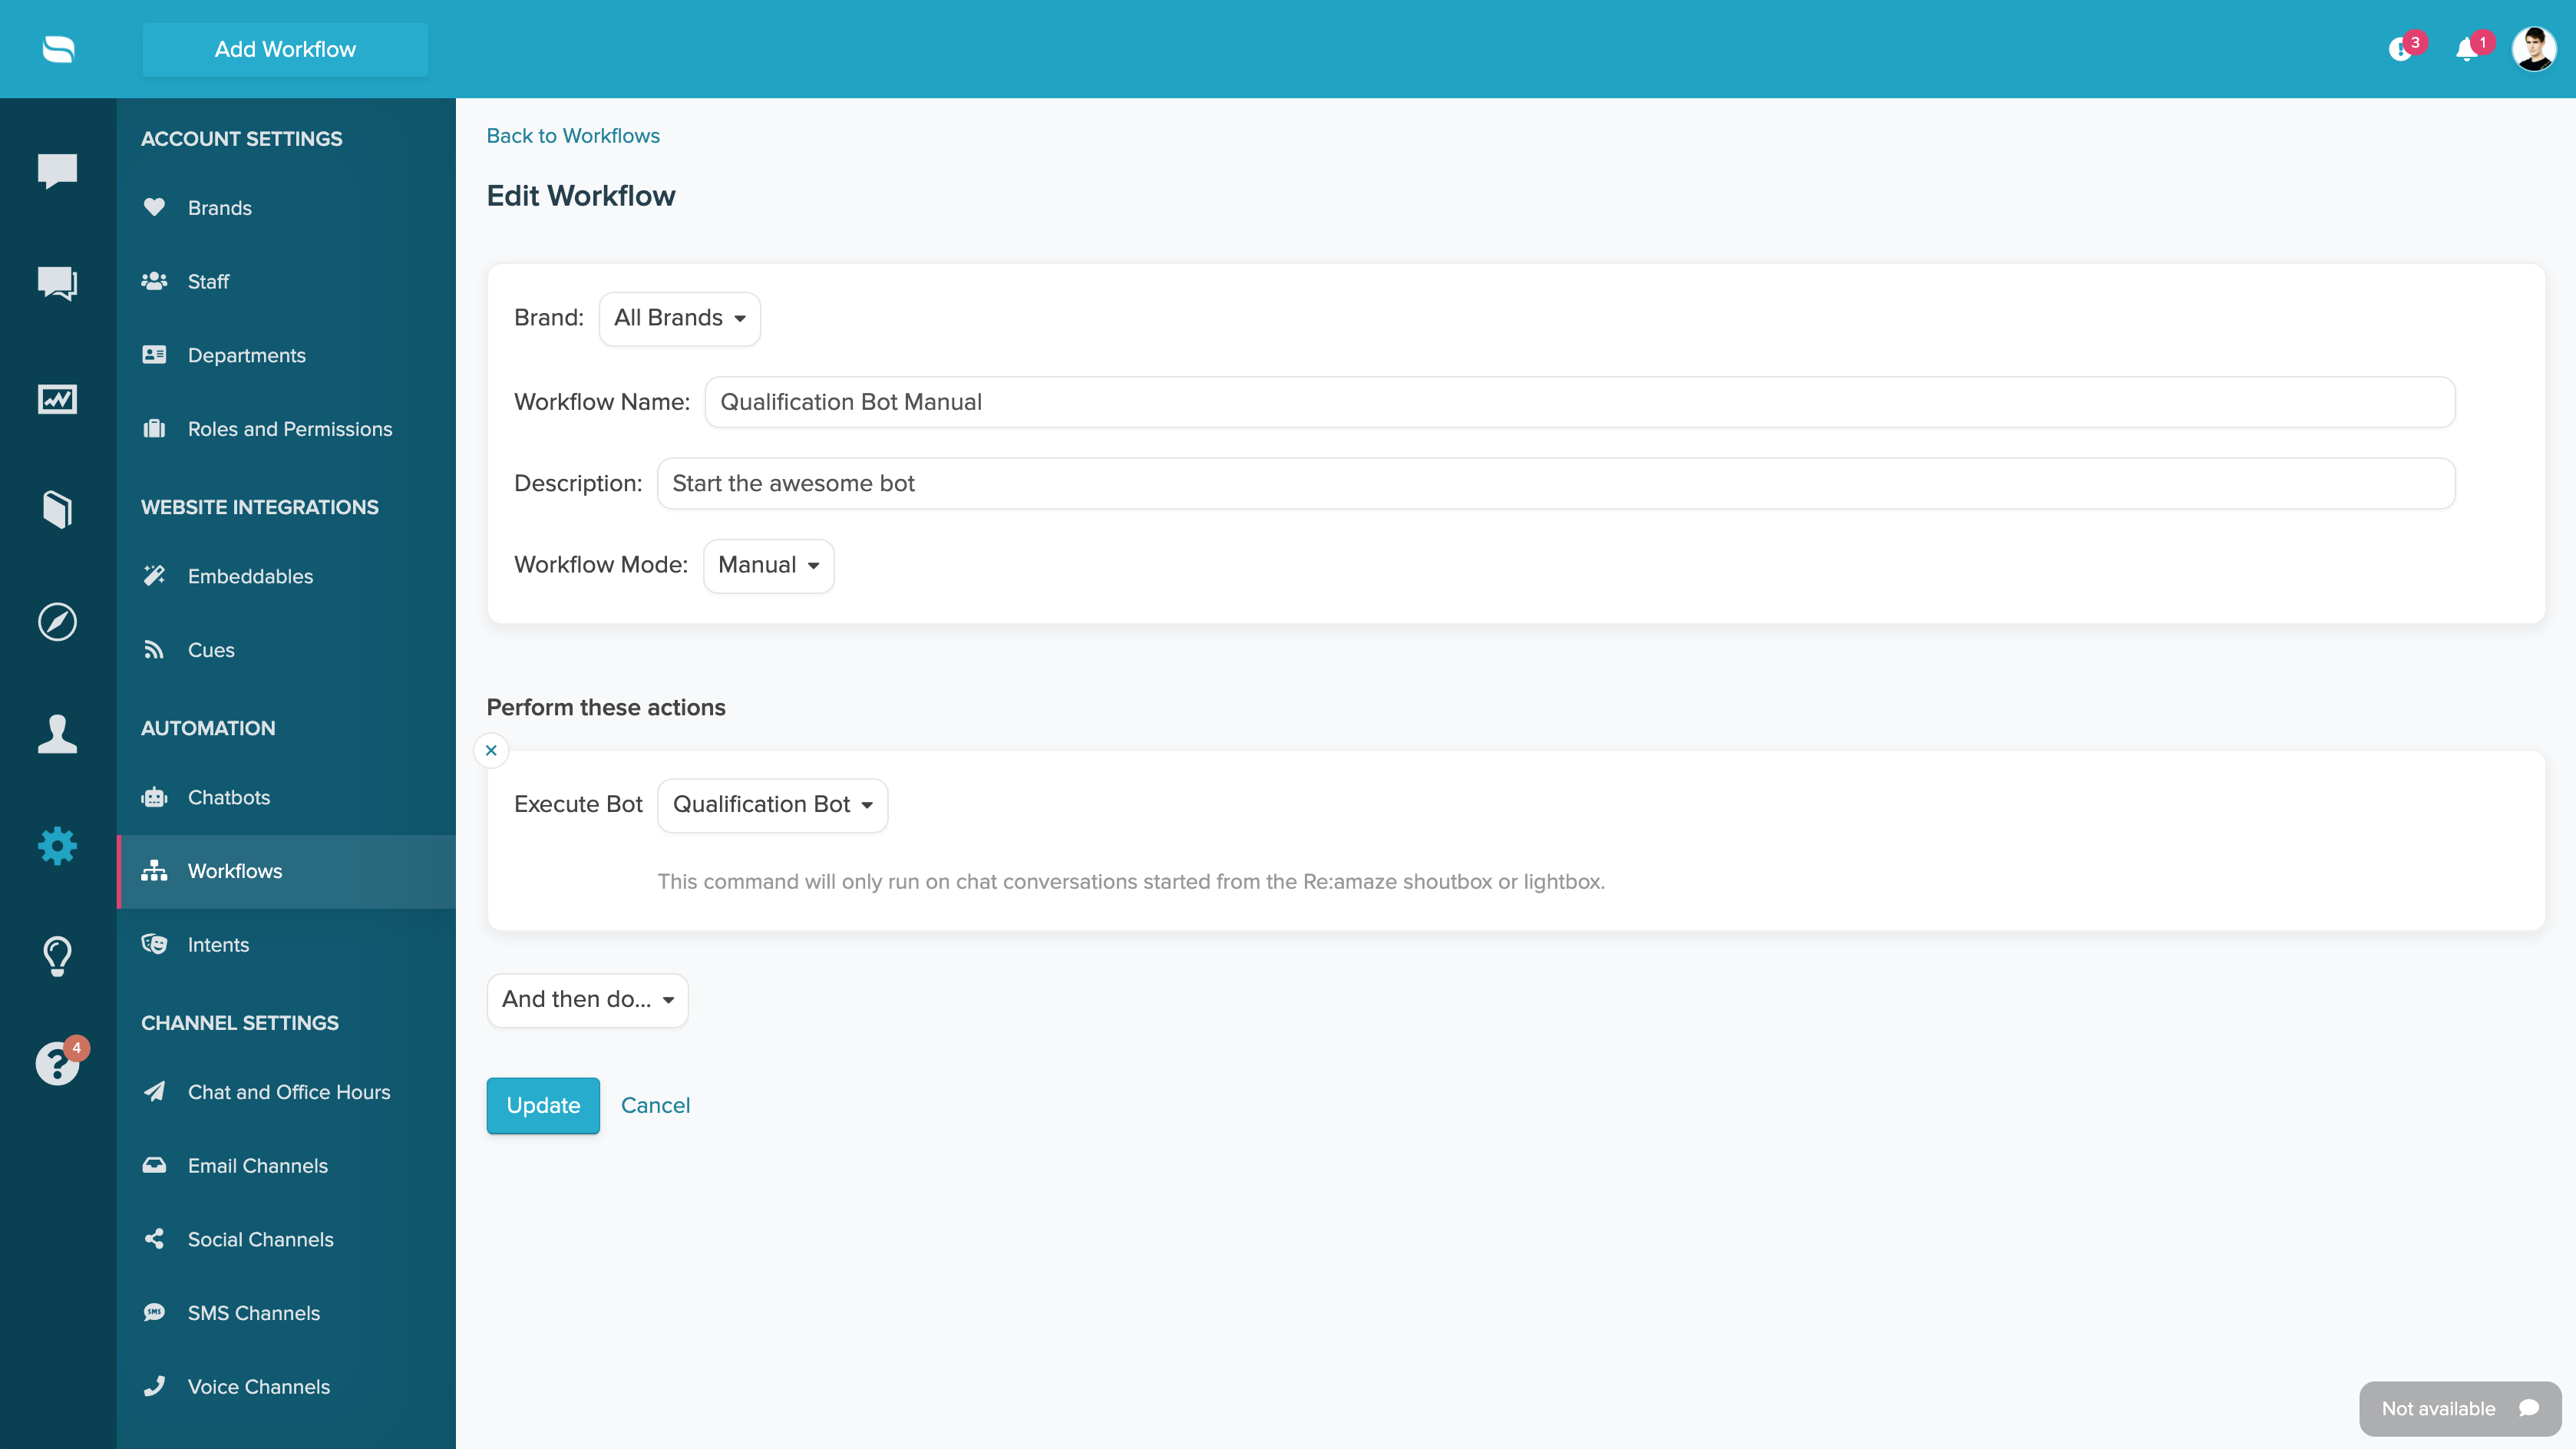
Manually Executing a Workflow Bot
Workflow Bots do not have to run automatically. Agents can manually send a customer into a bot flow whenever it makes sense.
For example, if a customer asks which tent is best for camping in cold weather conditions, you can launch a bot designed to ask follow-up questions and recommend the most suitable option. Manual execution is useful when a guided experience would help the customer, but the conversation does not meet automated workflow conditions.

What went wrong? (Optional)